Before you can create a cPanel account for a client, you must create a “Package.” This defines the limits (like Disk Space and Bandwidth) for that specific plan.
As a Reseller, you manage your business through WHM (Web Host Manager). The first step to selling hosting is creating your Packages (e.g., “Bronze,” “Silver,” “Gold”).
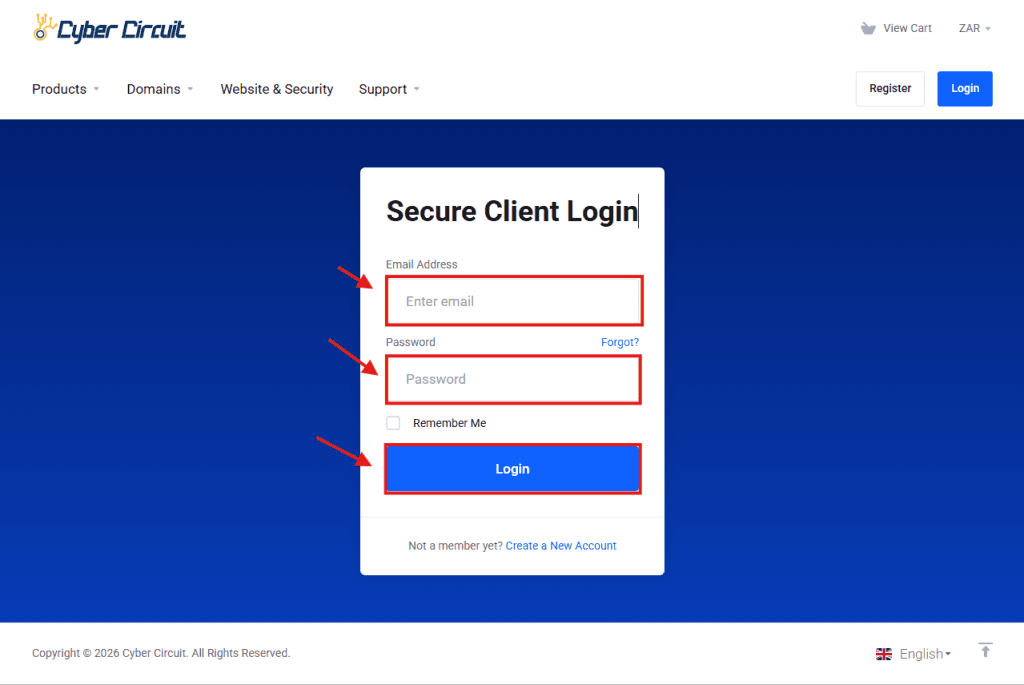
Step 1: Log Into Your Client Area
Go to the Cyber Circuit client area login page.
Log in using your email address and password.
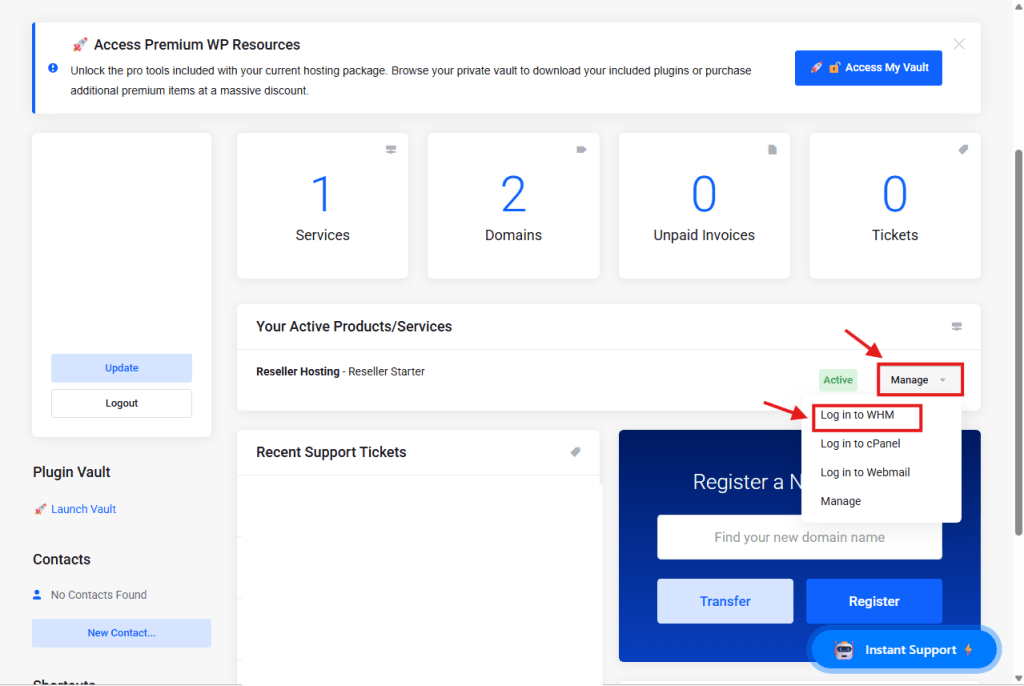
Step 2: Log Into WHM
From your Client Area Dashboard, look for your active Reseller Service.
Click the Manage button (or dropdown).
Select Log in to WHM.
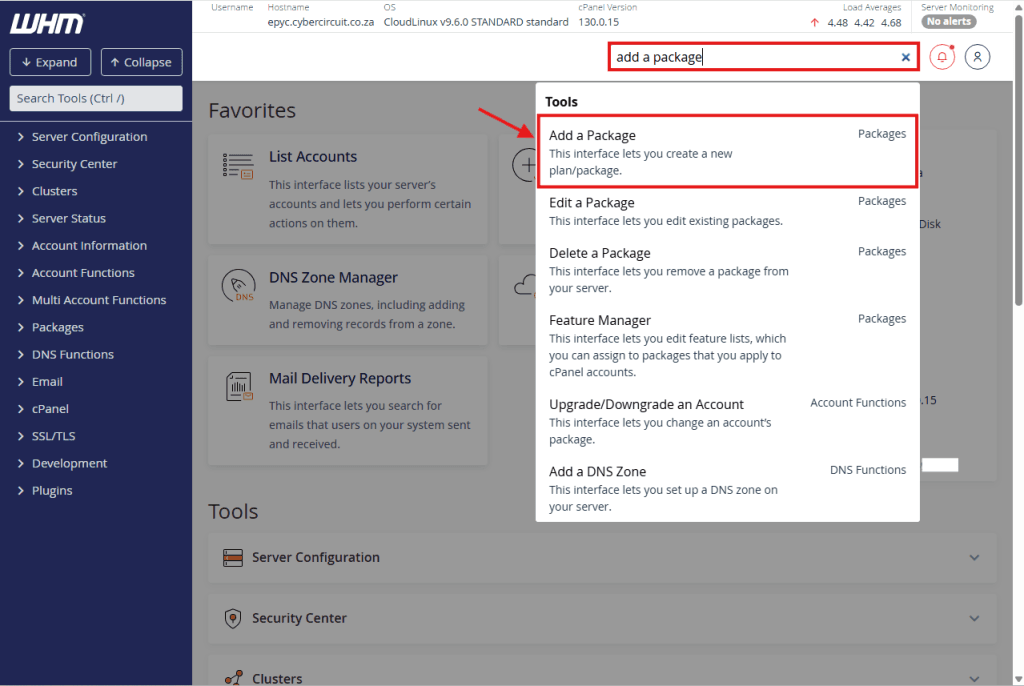
Step 3: Open "Add a Package"
Once inside WHM, look for the search bar at the top left.
Type “Add a Package”.
Click the link that appears in the menu.
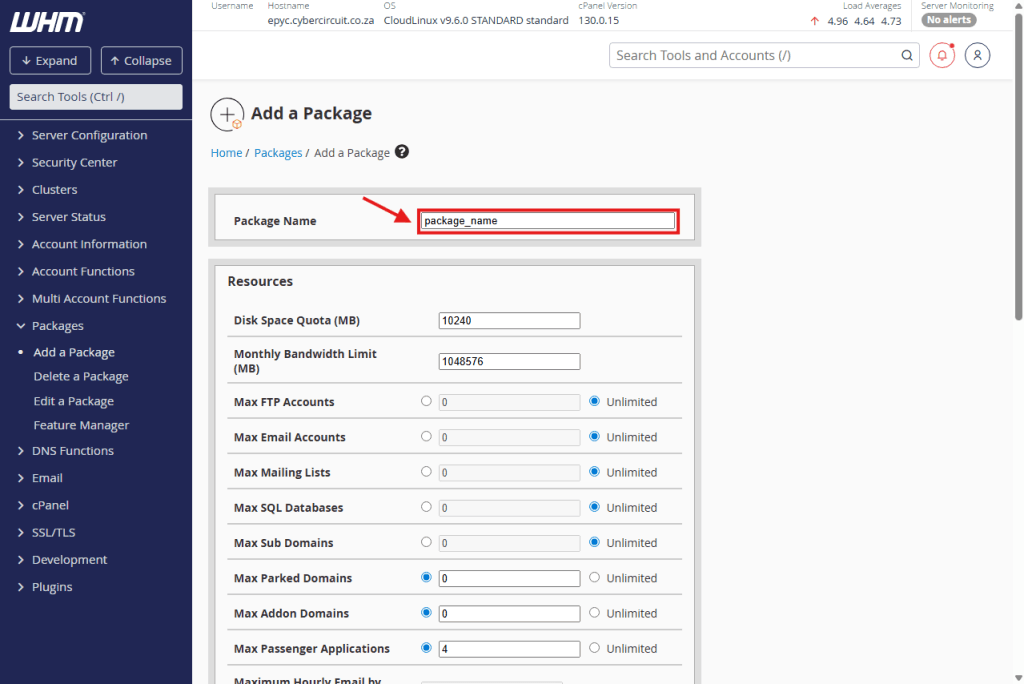
Step 4: Name Your Package
Package Name: Give your plan a name (e.g., Starter_Plan or Gold_Package).
Tip: Keep it short. Do not use spaces (use underscores _ instead).
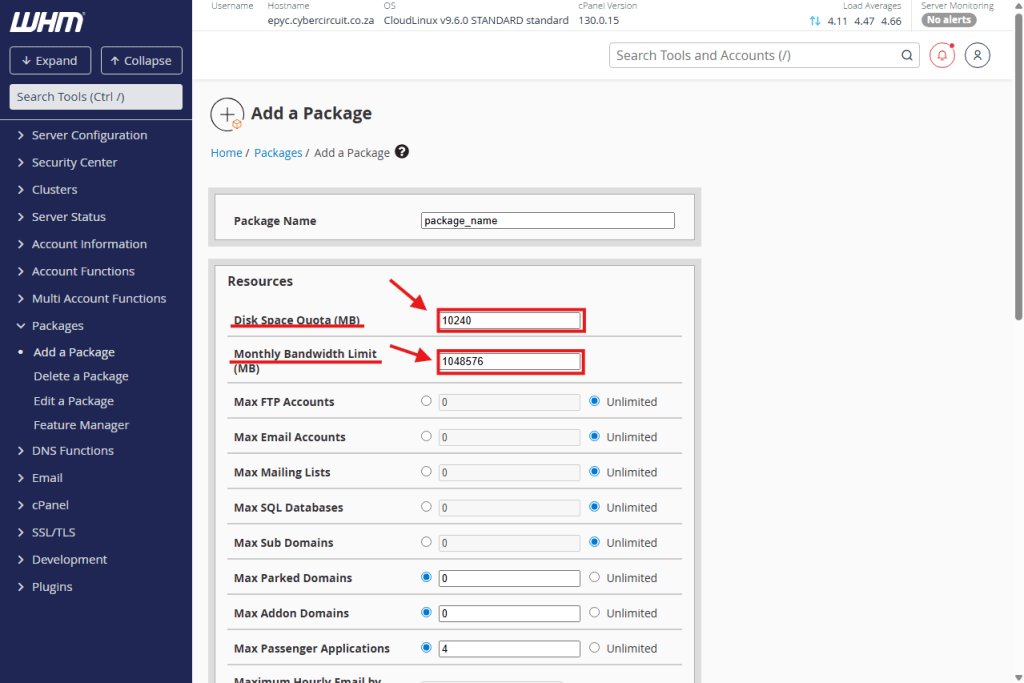
Step 5: Set Your Resources (Disk & Bandwidth)
⚠️ Important: WHM measures space in Megabytes (MB), not Gigabytes (GB).
1024 MB = 1 GB.
5120 MB = 5 GB.
Disk Quota (MB): Enter the amount of space you want to allow for this plan.
Monthly Bandwidth (MB): Enter the traffic limit (or set to Unlimited).
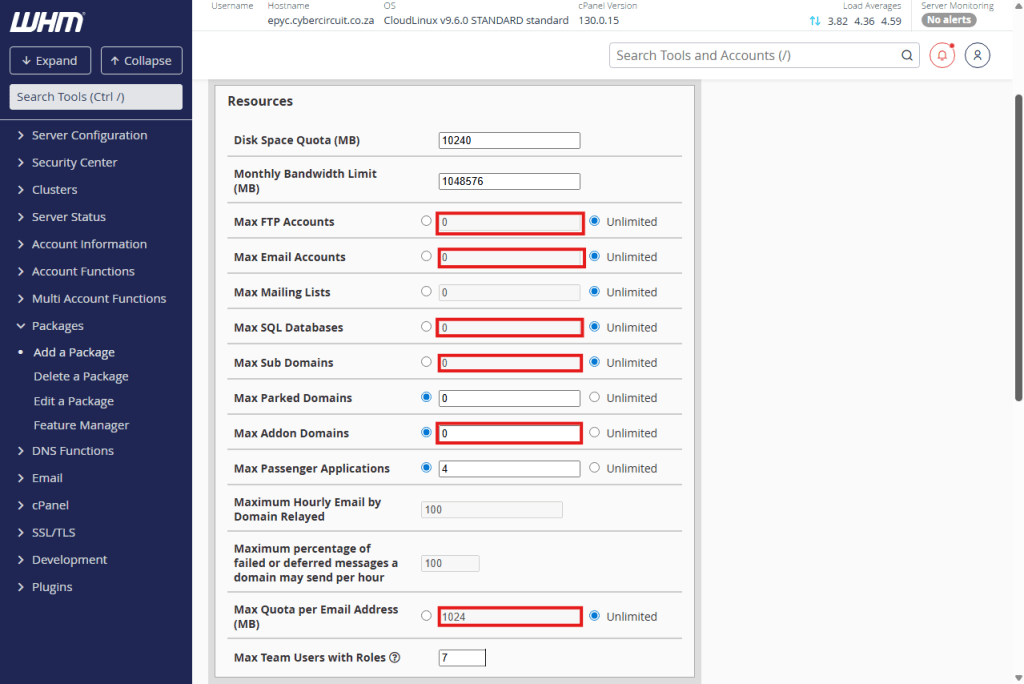
Step 6: Set Account Limits (Max Email, FTP, etc.)
Still inside the Resources section, scroll down to see the specific account limits.
Standard Features: Set your limits for Max FTP Accounts, Max Email Accounts, and Max SQL Databases.
Tip: To make these unlimited, click the circular button (radio button) next to “Unlimited”.
Domains:
Max Addon Domains: Set this to 0 if you want a single-site plan. Set it to 1 or more if you want clients to host multiple websites on one account.
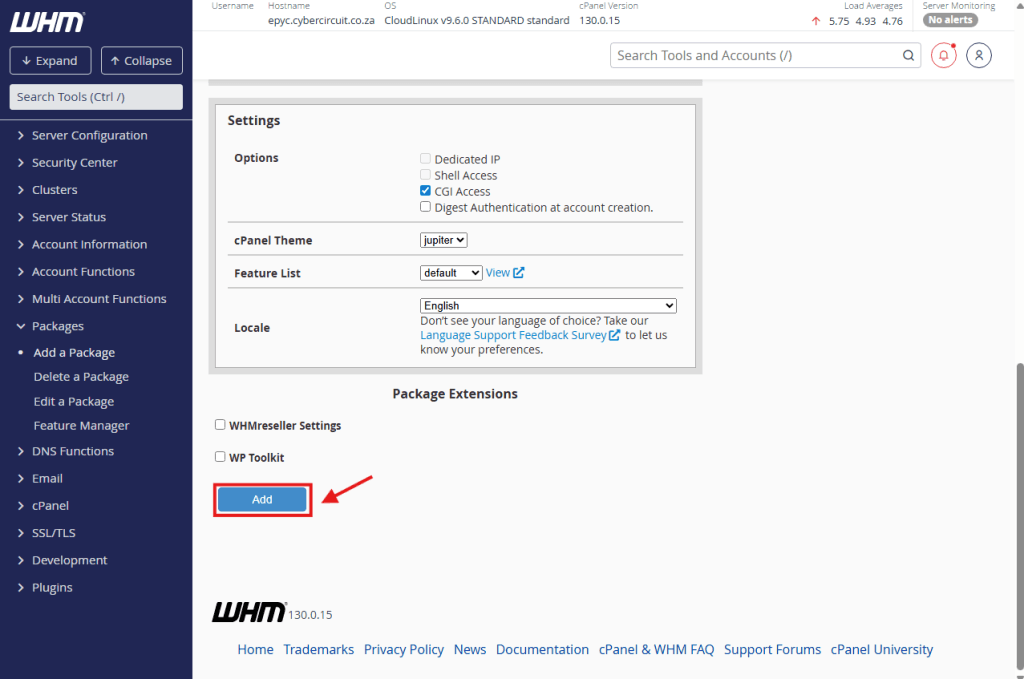
Step 7: Save the Package
Scroll to the very bottom of the page.
Click the Add button.
You will see a success message. You can now use this package to create client accounts!