Is a plugin or script telling you a “PHP Extension” is missing? Here is how to activate specific modules in cPanel.
Modern websites often require specific server tools (called “PHP Extensions”) to function. For example, a booking system might need the calendar extension, or a shop might need intl for currency formatting.
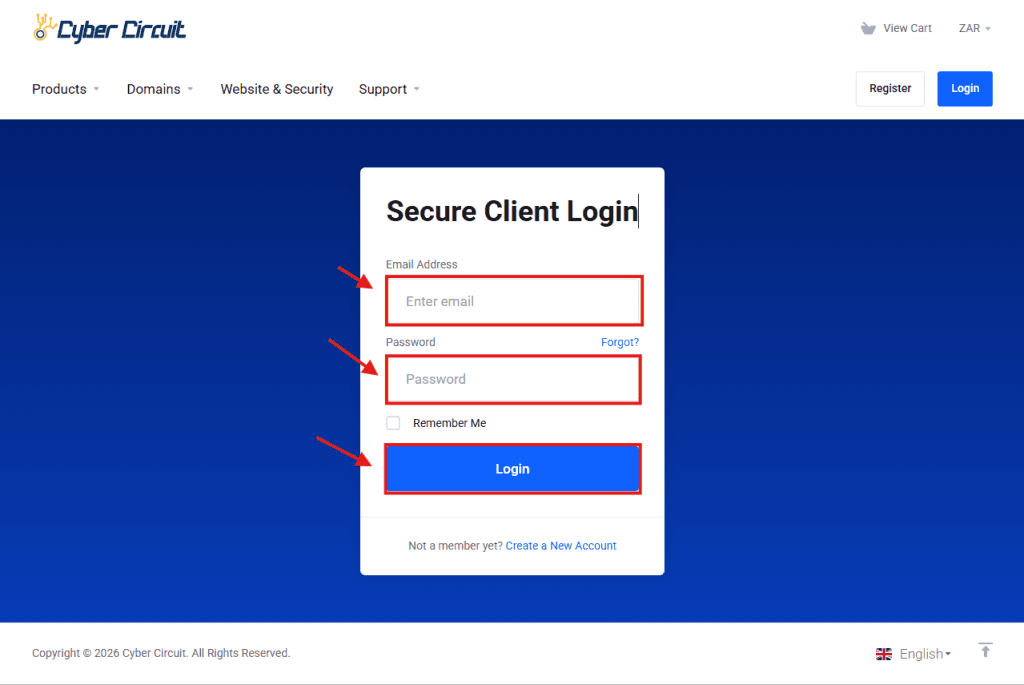
Step 1: Log Into Your Client Area
Go to the Cyber Circuit client area login page (https://cybercircuit.co.za/billing/).
Log in using your email address and password.
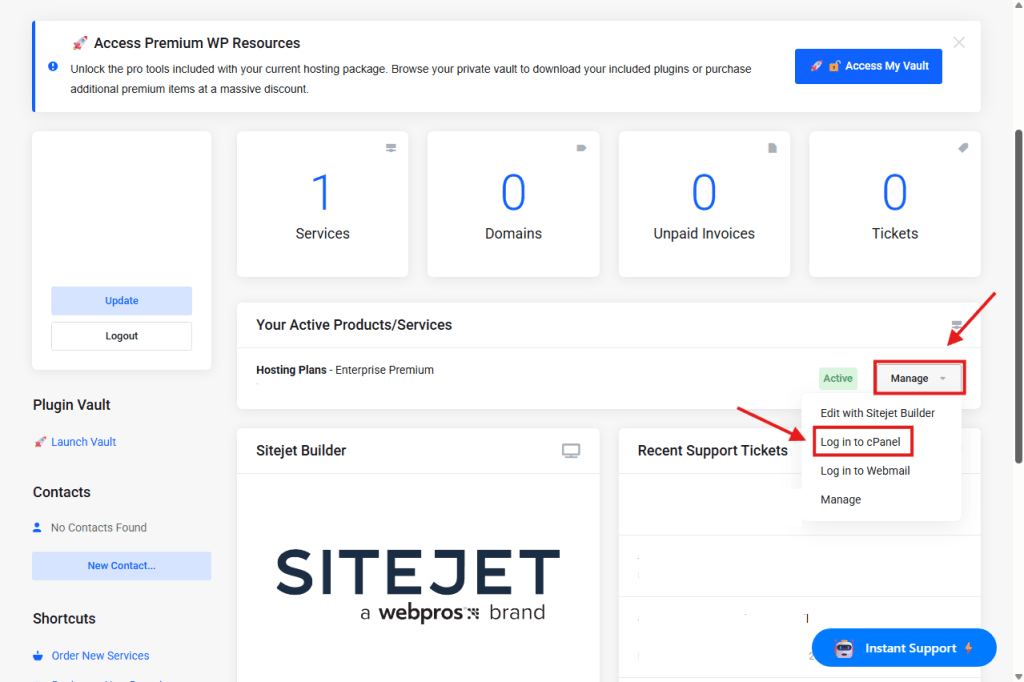
Step 2: Log Into cPanel
From your Client Area Dashboard, look for your active Products/Services.
Click the Manage button (or dropdown).
Select Log in to cPanel.
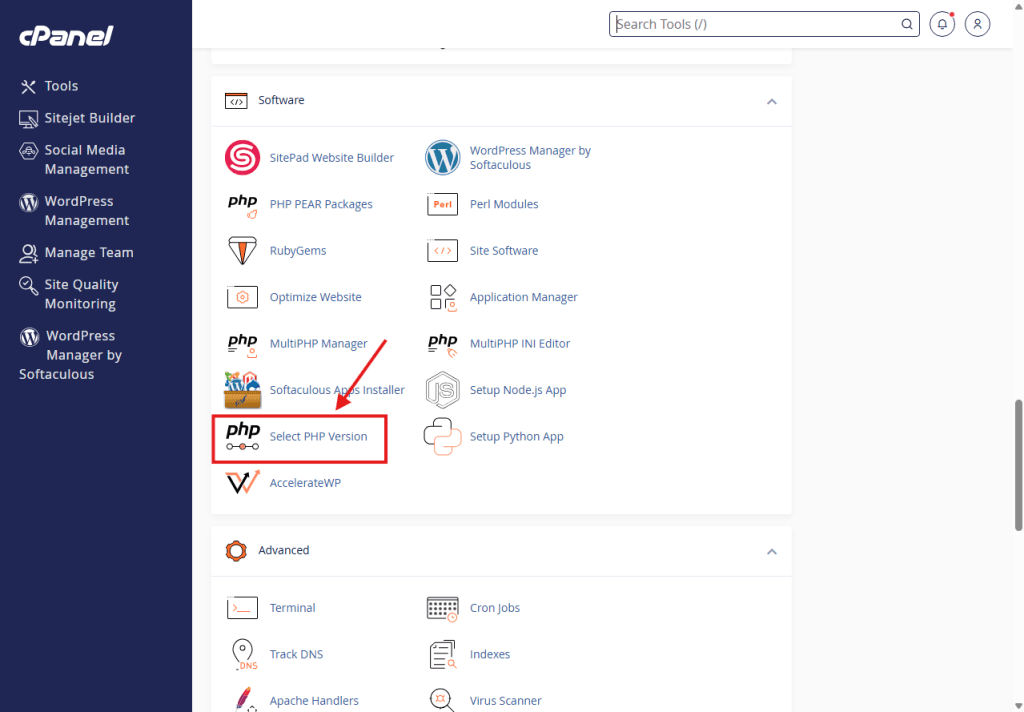
Step 3: Open "Select PHP Version"
Scroll down to the Software section.
Click on the icon labeled Select PHP Version.
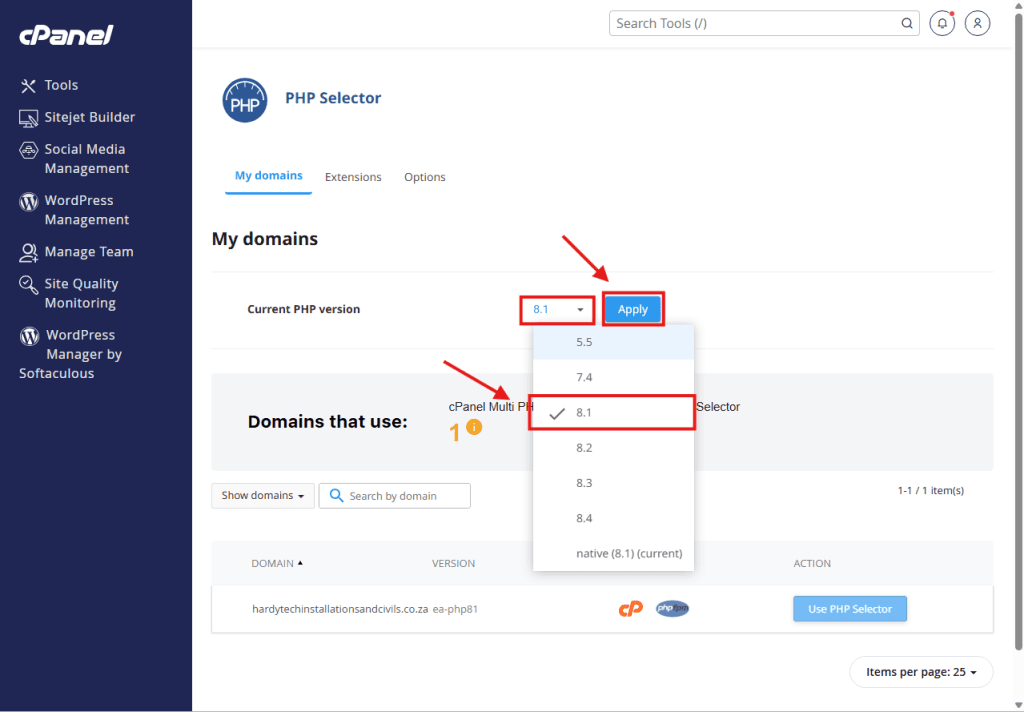
Step 4: Ensure You Are Not on "Native"
⚠️ Important: You cannot enable extensions if your PHP version is set to “native.”
Look at the Current PHP Version at the top.
If it says “native”, click the dropdown and select a specific version number (e.g., 8.2 or 8.3, etc.).
Click Apply.
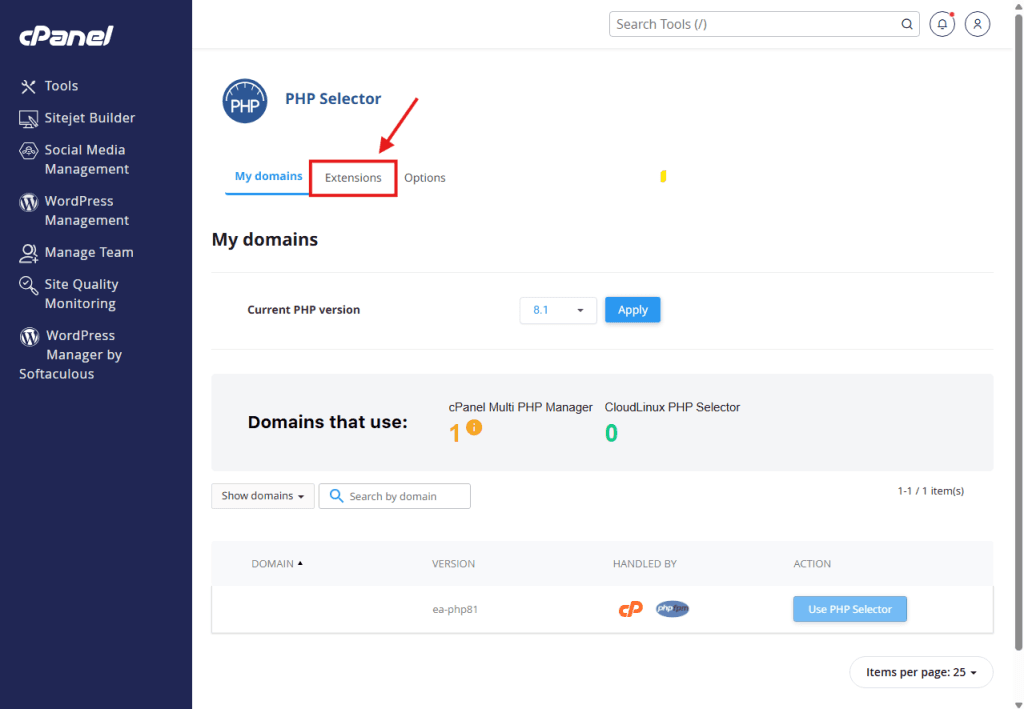
Step 5: Find the Extensions Tab
Depending on your view, you might see a tab labeled Extensions at the top. Click it.
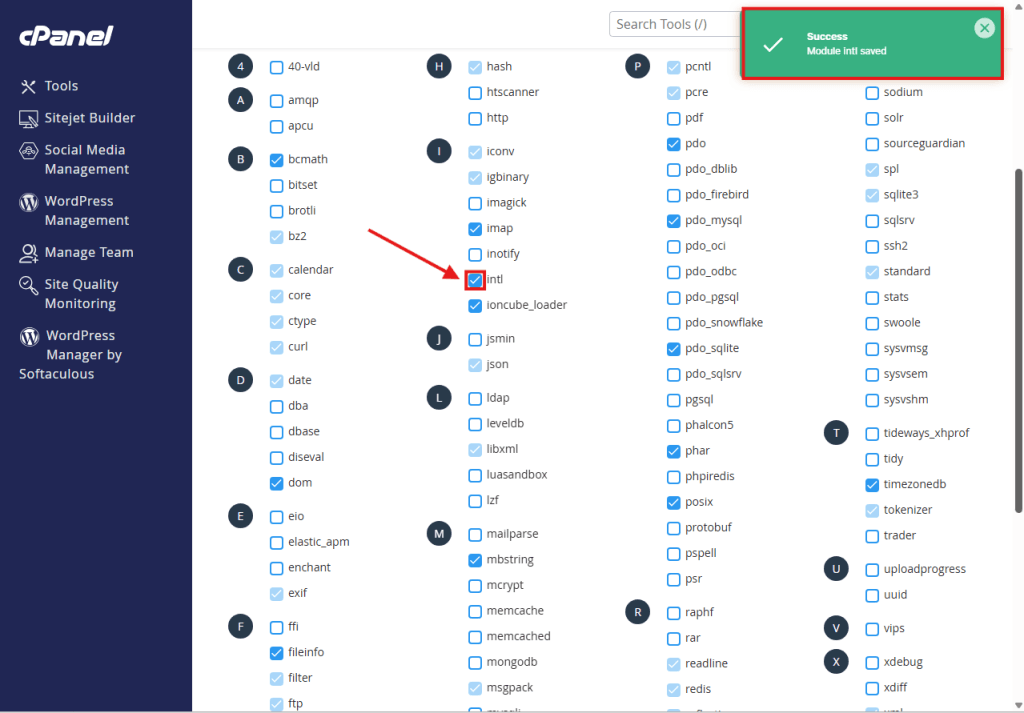
Step 6: Tick the Box to Enable
Scroll through the alphabetical list to find the extension you need (e.g., fileinfo, intl, gd, zip, soap).
Check the box next to the name.
Wait 1 second: You will see a small “Success” message appear in the top right corner. The change is saved instantly.
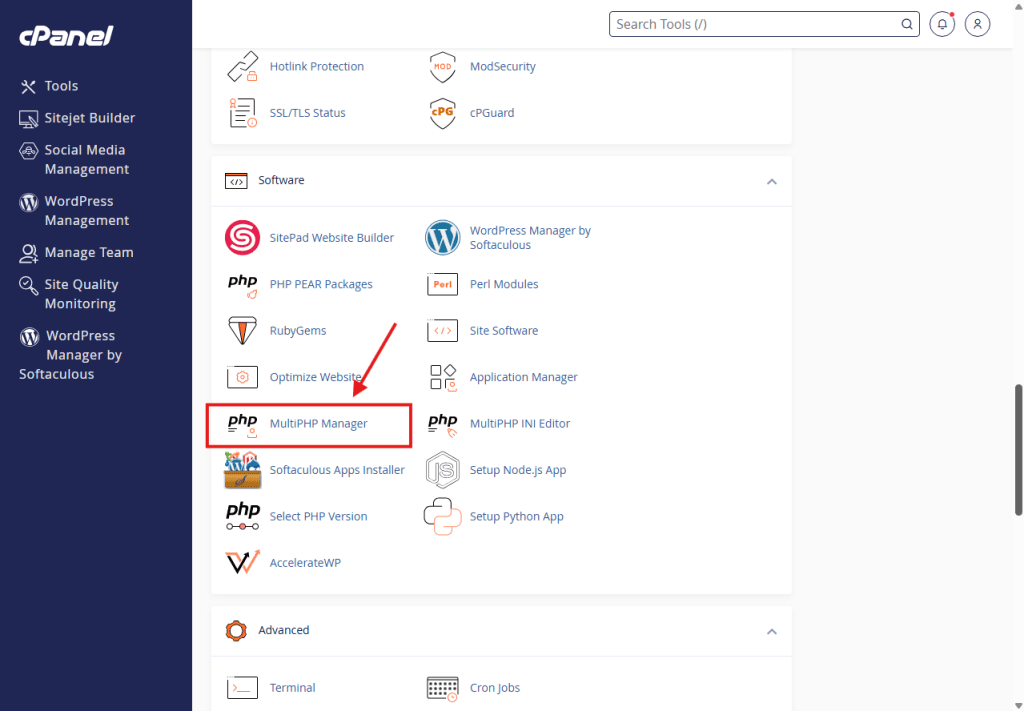
Step 7: Open "MultiPHP Manager"
Now that you have selected your extensions, you need to tell the server to use them.
Go back to the main cPanel Dashboard.
Scroll down to the Software section again.
Click on the icon labeled MultiPHP Manager.
Step 8: Select Your Domain
Scroll down to the bottom where your domains are listed.
Check the box on the left side next to the website you are working on.

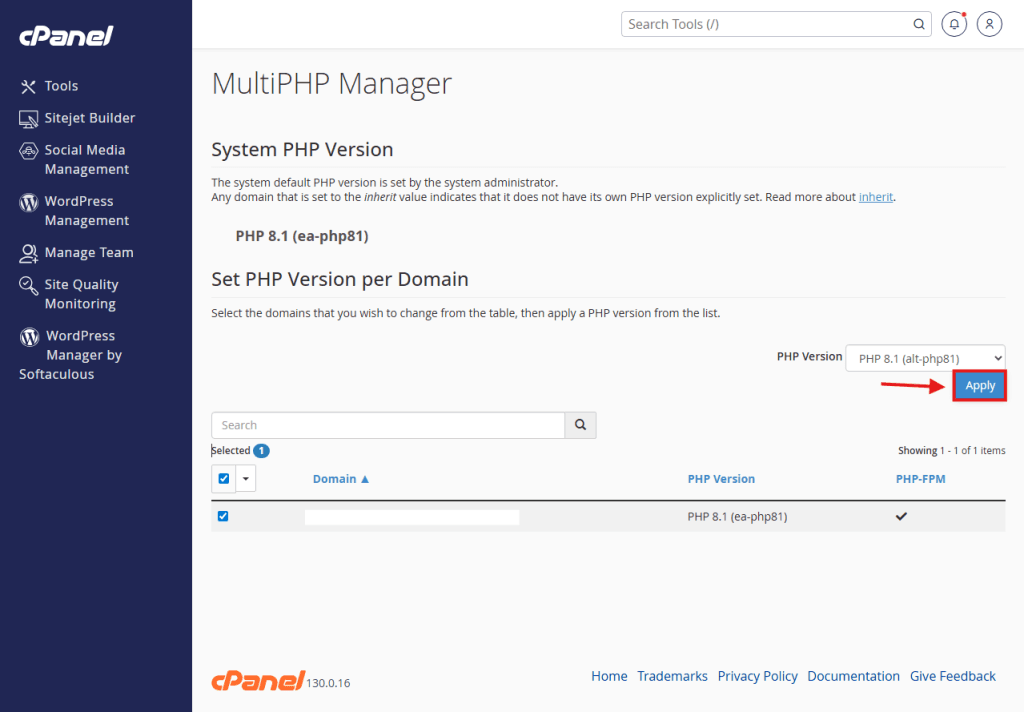
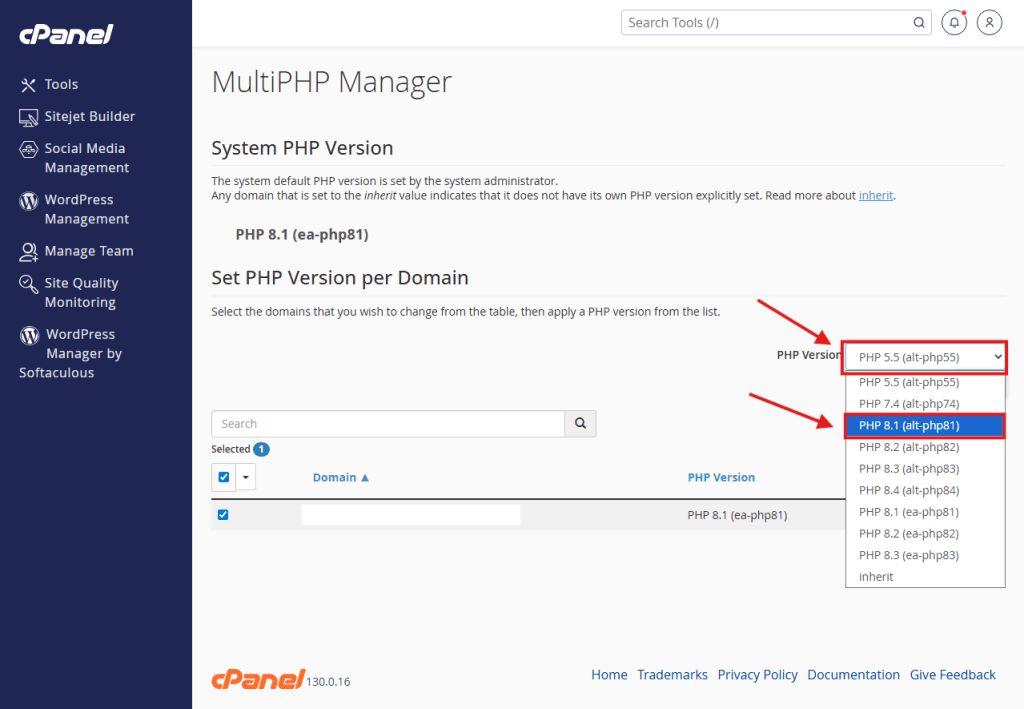
Step 9: Change to "alt-php" (Crucial Step!)
⚠️ Important: The default ea-php versions do not use the extensions you just selected. You must switch to alt-php.
Look at the PHP Version dropdown menu on the right side.
Do not choose the version starting with ea-php (e.g., ea-php81).
You MUST choose the version starting with alt-php (e.g., PHP 8.1 (alt-php81)).
Note: Make sure the number (e.g., 8.1) matches the version you used in Step 4.
Step 10: Apply the Change
Click the blue Apply button.
You will see a success message in the top right corner.
Done! Your website is now using the CloudLinux PHP version with your custom extensions enabled.